Submissions
Info
Last updated: September 29, 2021
The submission is the other key element in OJS. As a noun, "submission" is a generic term that includes articles, book reviews, and art. A submission has its own page, one or more galleys, and metadata. It will appear in the table of contents for an issue when assigned to a published issue.
Using the QuickSubmit Plugin
Info
Last updated: July 28, 2025 for OJS 3.3.0.19 and OJS 3.4.0.7
QuickSubmit is a tool for uploading submissions that bypasses all stages of the workflow. Use it to upload content that does not required review (such as editorials) or if you conduct your review and editorial workflow outside of OJS.
Important note: do not use this process to upload a single galley file of your full issue. Instead, see the instructions for Adding a full-issue PDF galley.
Contents:
- Published or Unpublished: which option to use for your publication model
- Finding the QuickSubmit plugin
- Uploading submissions with the QuickSubmit plugin
- Finding and editing submissions after completing QuickSubmit
Published or Unpublished: which option to use for your publication model
All publication in OJS happens at the issue level, so using QuickSubmit alone does not necessarily publish the submission. There are three ways to publish the submission, depending on your publication model:
- In Step 7 below, select Published and then, in Step 8, assign the submission to a Back Issue or the Current Issue that has already been published: when you complete the process, the submission will immediately appear online as part of that issue.
- In Step 7 below, select Published and then, in Step 8, assign the submission to a Future Issue that has not yet been published: when you complete the process, the submission will appear online when you publish the issue.
- In Step 7 below, leave the selection as Unpublished: you can then find the submission at a later date and edit the details later to assign it to an issue.
Finding the QuickSubmit plugin
Once logged in, click Tools in the left-hand sidebar. This brings you to the Import/Expert tab of the Tools page. You should see QuickSubmit Plugin in the list of tools – if you do not, contact contact YDJ to have the plugin upgraded.
Uploading submissions with the QuickSubmit plugin
Use the form once for each submission.
- Choose Submission Language, if applicable
- Choose appropriate Section
- Full title goes in Title
- Add the Abstract, if applicable
- For each contributor, Click Add Contributor (button to the right of "List of Contributors")
- In the Add Contributor window, enter the author’s Name.
- Under Contact, you have two options for the email address you enter:
- If this is a) the first publication of the submission and b) your journal uses the ORCID plugin, you should enter the author’s email address;
- if this is not the first publication of the submission (ie, it was initially published on another platform) or you do not use the ORCID ID plugin, you should enter your email address or a generic address. It will not appear on the journal website and the author will not receive potentially confusing email from the system.
- Select the Country (this is a mandatory field but does not appear anywhere on the website).
- Select the Contributor’s Role.
- Then, click Save.
- Repeat the Add Contributor process for all authors.
- Upload the article text (the galley) under Galleys. Click Add galley.
- In the Create New Galley window, enter the file format under Galley Label (usually "PDF") and ensure the Language is properly set. Click Save.
- Select the Article Component. This will almost always be Article Text. Then either drag the file from your desktop to the window or click Upload File to search for it.
- Once the file name appears in the window with a green check, click Continue.
- In the next tab, click Continue.
- In the next tab, click Continue.
- If you have galleys in other formats, repeat steps a-e with appropriate label.
- Select either Unpublished or Published. (NB: the Publish/Unpublished buttons are mislabeled – they should be Scheduled/Unscheduled).
- If you wish to assign the submission to a Back Issue or Future Issue, select Published and continued to step 8.
- If you wish to assign the submission to an issue at a later date, select Unpublished and skip to step 10. You must then find and edit the submission by assigning it to an issue at a later date to publish it.
- In the Schedule for publication in drop-down, select the appropriate issue.
- If you assign the submission to an issue that was already published, submission will be published when you click Save. If you assign the submission to a future issue, it will only be published when you publish the issue.
- Enter the Date of Publication under Published (likely today’s date).
- Click Save. You will be brought to a confirmation screen.
Finding and editing submissions after completing QuickSubmit
If you need to edit a submission after creating and saving it in QuickSubmit, you can find it in one of your submissions queues. Access your submission queues by clicking Submissions at the top of the left-hand navigation menu.
- If you did not assign an issue in step 7, the submission will appear in All Active. If you are retrieved the submission with the same account that uploaded it, it will also appear in My Active.
- If you did assign and an issue in step 7, the submission will appear in the Archives queue with the Scheduled status.
Once you find the submission in the proper queue, you can edit it. To edit the submissions:
- Click View to the right of the submission entry in the queue
- Click the Publication tab to edit the submission metadata, upload or change the galley file, change the section, or assign it to an issue
- Click Save at the bottom of the screen after making any changes.
At the time of the latest update to this page, dates entered in QuickSubmit do not save when the submission was published: regardless of the date entered in step 8, it will be changed to the date the issue is published when you publish it. If you need to backdate submissions, please contact YDJ.
Adding and replacing galleys
Info
Last updated: September 29 for OJS 3.3.0.8
The galley is the final form of the article – editing, copy edited, and laid out – that is posted to the OJS site for reading. Galleys are usually uploaded as PDFs.
Adding a galley
Galleys are not brought forward from the submission’s Workflow tab. They must be manually added to the Galleys facet of the Publication tab.
To upload a galley for an submission:
- Open the submission and navigate to the Publication tab, then to the Galleys facet.
- Click Add Galley. This opens the Create New Galley window.
- Add the Galley label. This is typically the file format.
- Select the Language
- Click Save.
- Select the Article Component. This is usually "Article Text."
- Drag and drop the galley file from your desktop to upload area OR click Upload File and select the galley file from your file directory.
- Click Continue.
- Rename the file if you wish, the click Continue.
- Click Complete.
Replacing a galley
If the submission has already been published, you will need to create a new version in order to replace the galley. Replacing the galley constitutes a major change and requires a new version instead of unpublishing and republishing the submission.
- Open the submission and navigate to the Publication tab, then to the Galleys facet.
- Click the blue arrow next to the galley label and click Change File.
- In the first drop-down, select the file you wish to replace.
- Drag and drop the galley file from your desktop to upload area OR click Upload File and select the galley file from your file directory.
- Click Continue.
- Rename the file if you wish, the click Continue.
- Click Complete.
Changing the section of a submission
Info
Last updated: July 26, 2021 for OJS 3.3
To change the section to which a submission is assigned:
- Open the Production tab for the submission
- Open the Issue tab
- Use the drop-down menu under Section to change the Section.
Editing a submission after publication
Info
Last updated: September 12, 2022 for OJS 3.3.0.11
Go to Submissions > Archive to find a list of published submissions. You can search for articles by name or by submission ID.
Alternatively, you can find a link to submissions in the tables of contents of published issues via Issues > Back Issues.
- Click the submission title in the Archive.
- Open the Publication tab.
- Click either Unpublish or Create New Version
- Use Unpublish if making minor changes or adding to the metadata of a submission (eg, updating the publication date or adding a reference list).
- Use Create New Version if you’re making more substantive changes (changing the galley file, title, or contributor info) to a submission.
- Make edits in the Production sub-tabs, as required. Click Save at the bottom of each screen as you edit.
- When finished, click Schedule for Publication. The submission will be republished to the same issue.
Fixing the error: "the submission must be in the Copyediting or Production stages…"
When you attempt to republish or publish new versions of very old submissions, you may encounter an error message that says, "The submission must be in the Copyediting or Production stages before it can be published" (Figure 1). This may happen when submissions have been created and published through an earlier version of the QuickSubmit plugin, especially in OJS 2.
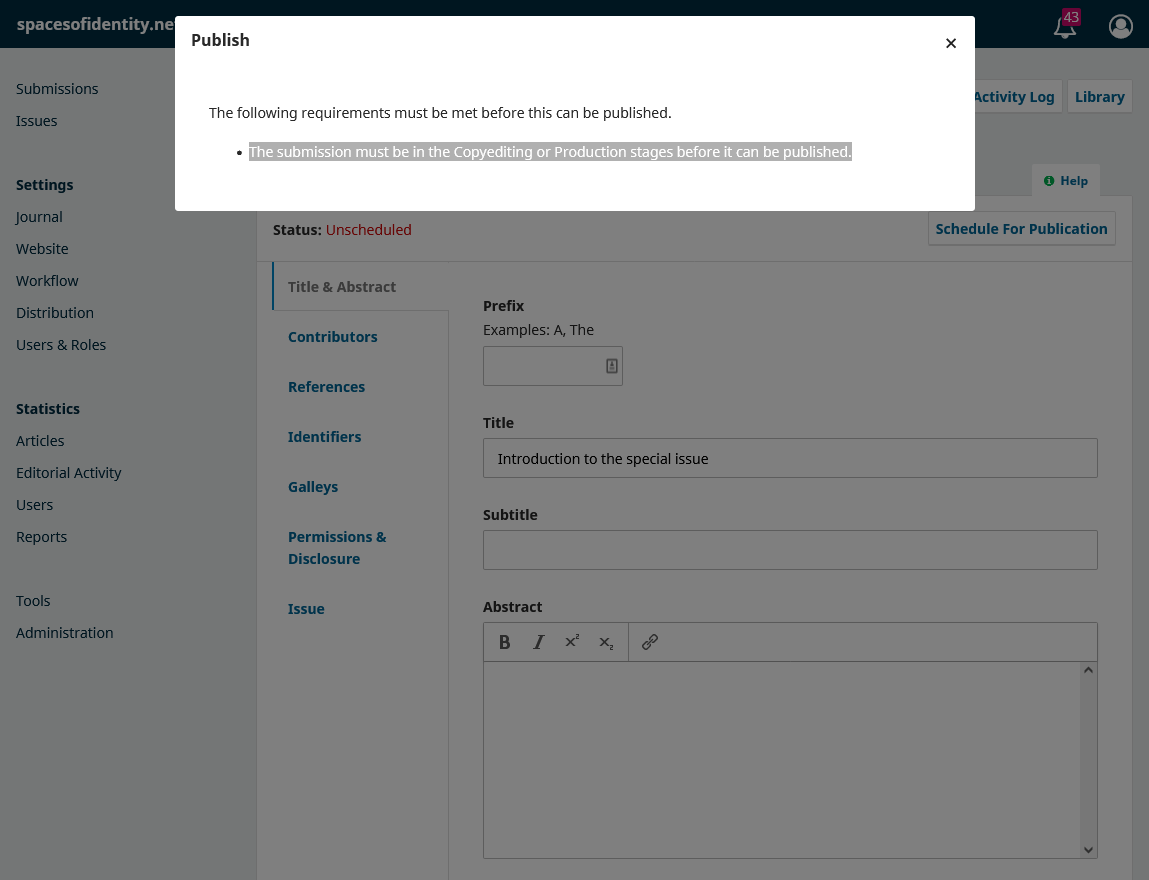
Figure 1: a screenshot of the error message that prevents some submissions from being re-published or having new versions published.
To resolve this error, you must assign an Editor to the submission and reapprove the submission for publication:
-
Review the status of the Workflow sub-tabs:
-
In Submission sub-tab, the square above Participants should say "Assign an editor to enable the editorial decisions for this stage." There should be no Editor listed in the Participants area (Figure 2)
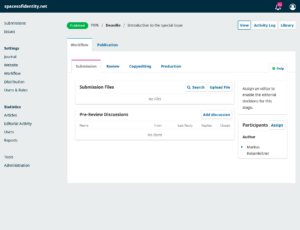
Figure 2: the Submission sub-tab shows that there is no Editor for this Submission
-
The Review sub-tab should say "The review process has not yet been initiated" (Figure 3)
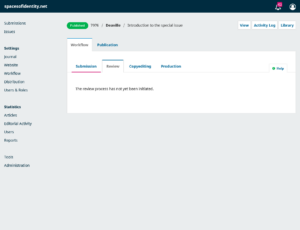
Figure 3: the Review sub-tab shows that the Review stage has not yet been initiated.
-
-
Assign the Editor to the submission:
- In the Submission sub-tab, next to Participants click Assign
- In the Assign Participant window that pops up, set the drop-down menu under Locate Role to the appropriate editorial role for your account
- In the list of names, select your user account
- Ensure the predefined message template and Message fields are blank
- Click OK.
- Update the decision:
- In the Submission sub-tab, click Change decision
- Click Accept and Skip Review
- In the Accept and Skip Review window that pops up, select "Do not send an email notification"
- Click Next: Select Files for Copyediting
- Click Record Editorial Decision. The page should reload at the Copyediting sub-tab.
You should now be able to republish or publish a new version of the submission.
Cleaning up unwanted submissions in the editorial queues
Info
Last updated: July 16, 2026 for OJS 3.5
You may end up with several kinds of unwanted submissions:
- incomplete submissions abandoned by the authors,
- duplicate submissions created in error,
- submissions created for purposes of testing, training, or troubleshooting
The method of cleaning these up depends on whether the submissions are complete (have gone through the entire Submission Wizard and are awaiting editorial review) or are incomplete.
Declining completed submissions
If a submission is complete, you must decline it. You must do this individually.
This is the case for submissions at any stage of the Workflow, inlcuding those that have completed Production (this will be the case for submissions made through QuickSubmit). The process will vary slightly, depending which Workflow stage it has reach and if it has been scheduled for publication.
In summary, you must revert any editorial decisions until you reach either the Submission or Review stage of the workflow, and then decline the submission as an editorial decision.
To decline a completed submission:
- Find the submission in your editorial queue and click View
-
If the submission information opened to Publication: Title & Abstract (or any other tab whose title starts with Publication), click the Production tab in the left-hand menu
a. if it did not, skip to step 3
-
If you are now at Workflow: Production, click Back to Copyediting
a. if you are not, or if the Back to Copyediting button does not appear, skip to step 5
-
On the resulting page, click Record Decision and then click past the confirmation
-
If you are now at Workflow: Copyediting, click Cancel Copyediting
a. if you are not, or if the Cancel Copyediting button does not appear, skip to step 7
-
On the resulting page, click Record Decision and then click past the confirmation
- If you are at Workflow: Submission or Workflow: Review, click Decline Submission
- On the resulting page, click Record Decision
- If prompted, you may opt to send the email notification to the author or skip it.
Upon completing this process, the submission will move to the Declined queue.
Deleting incomplete submissions
If a submission is incomplete, you may delete it outright. This is process can be done in bulk to multiple submissions simultaneously.
To delete incomplete submissions:
- Go to the All in Submission Stage queue
- Click the icon with three dots next to the Filters button
- The Delete Incomplete Submissions button will appear. Click it
- Follow any resulting prompts as appropriate.
Deleted incomplete submissions will be purged from the system.
Adding data sets to articles
Info
Last updated: July 29 for OJS 3.3
To upload a data set to OJS and make it available alongside the galley:
- Go to submission’s Production tab and click Galleys.
- Click Add Galley.
- In the Create New Galley window, enter the file format under Galley Label. You may wish to add a descriptive title in parentheses, eg, "CSV (data set)."
- Click Save.
- Select the "Data Set" in the Article Component.
- Upload the data set by dragging and dropping the file or clicking Upload File_._
- Click Continue.
- Edit the Name the file field, if necessary.
- Click Continue.
- Click Complete.
Once published, a link to the data set will appear on the submission’s metadata page (see Figure 1).
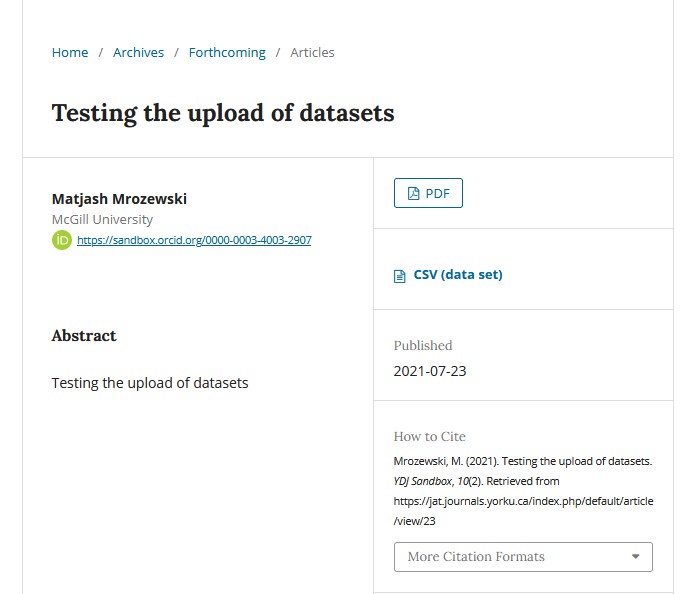
Figure 1: Once published, a link to the uploaded data set will appear below the link to the Article Text galley.
If the data set is hosted in an external repository such as York University Dataverse, it is possible to link to the external site instead of republishing the data set in OJS. To link to an external data set:
- Follow steps 1-3 in the list above.
- Check the box labelled This galley will be available at a separate website.
- Enter the URL of the data set.
- Click Save.
Once published, a link to the data set will appear on the submission’s metadata page (see Figure 2).
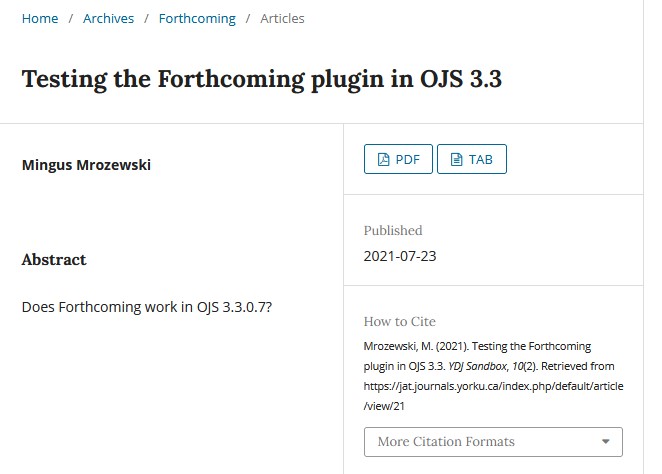
Figure 2: Once published, a link to the external data set will appear next to the link to the Article Text galley.
Adding DOIs to submission galleys before publication
Info
Last updated: November 19 for OJS 3.3
If your journal has been configured for DOIs, you can easily determine what the DOI will be before you publish it. This way, you can add the DOI to the galley even though it is not possible to view the DOI before publication.
See the chapter on the structure of DOIs to determine what a submission's DOI will be and to transform the DOI into a URL. Once you have determined the DOI and transformed it into a URL, you can add the DOI to the galley as a link that will go live once the submission is published.
Retrieving peer review requests
Info
Last updated: August 26, 2026 for OJS 3.5
If a peer reviewer is unable to locate the initial peer review request email or the link to the peer review, there are two ways to get access to the required information:
- If the reviewer has already created an account, they can log into OJS and access the request through the dashboard.
- If the reviewer has not created an account yet, you can retrieve the review request email, copy the details, and manually share it with them.
Directing a reviewer to access the OJS dashboard
For a reviewer to access their OJS account and peer review requests:
-
Log into the journal's OJS site
a. If the user cannot access their account, see (Helping users who cannot access their accounts)[ojs-site#helping-users-who-cannot-access-their-accounts]
-
Once logged in, the first thing they see should be the list of active reviews requiring action; alternatively, they may consult the queues listed under "My Assignments as a Review" in the left-hand menu of the dashboard.
Retrieving the review request email
To retrieve the contents of the original review request email:
- Go to the submission information page for the submission in question
- Click Activity Log at the top right of the window
- Look for the log entry for the original review request. In the Event column, the entry should say something like "An email has been sent: [JOURNAL ABBREVIATION] Article Review Request"
- Click the blue arrow next to the date
- Click View Email
- Copy the relevant information and email it to the reviewer